REVIEW: LOWEPRO WHISTLER BP 350 AW

When it comes to bags, photographers are spoilt for choice. Camera bags come in so many different shapes and sizes that it should be easy for anyone to find the ideal bag.
As a landscape photographer my perfect bag would be a good sized, hard-wearing backpack. Not so large as to become a burden, but big enough to hold a reasonable amount of camera gear with enough space left over for all the other items I might need – extra layers, refreshments and occasionally a few things for an overnight stay.
Backpacks fitting that description are somewhat thin on the ground and those I have found, while being good enough quality, don’t quite fit my needs, being either too big for a daypack or having plenty of room for camera gear but hardly any space for other items or vice versa. Enter the Lowepro Whistler.
Overview
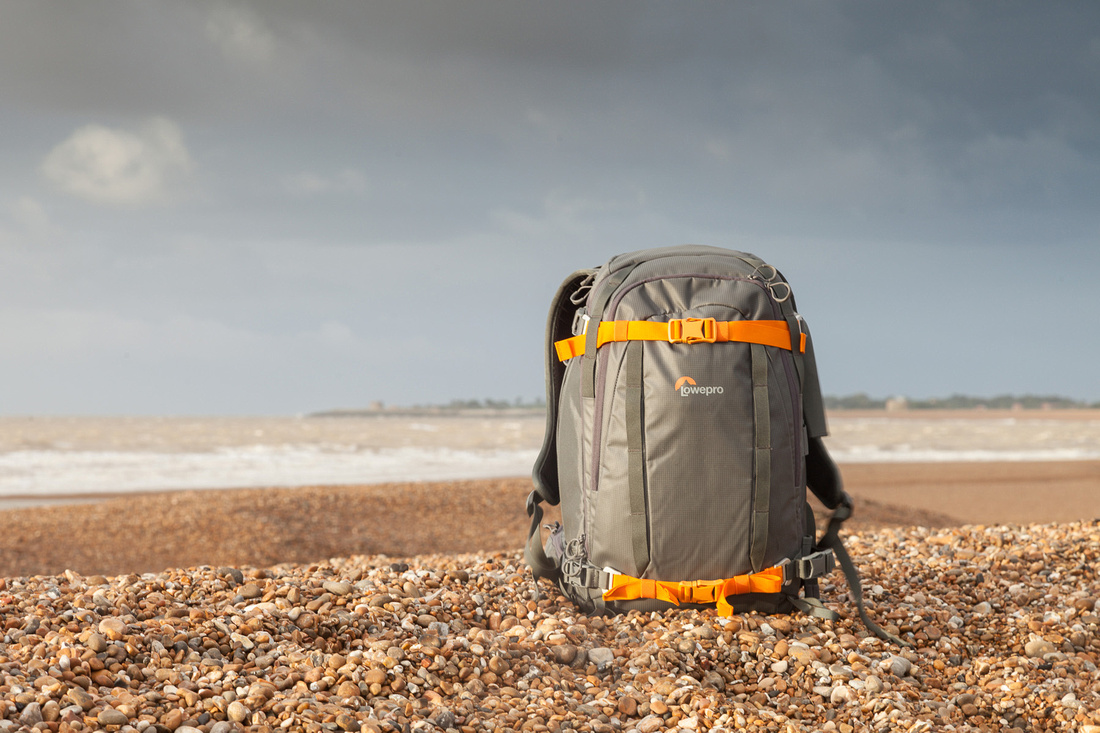
Described by Lowepro as ‘an all-season extreme performance outdoor backpack, born on the side of a mountain’ and finished in a rugged grey with orange trim, the Whistler is an attractive looking bag. Admittedly, ‘extreme’ and ‘mountainous’ aren’t the first words that spring to mind when describing my native East Anglia, where I do most of my photography, but otherwise it certainly ticks all the boxes.
The smaller of the two bags in the range, the 350AW is still reasonably large 29.5 x 30 x 53cm but the first thing you notice is how well made this bag is. Everything from the 420 dernier ripstop nylon fabric, to the reinforced Hypalon base, chunky zips and buckles feels built to survive the rigours of outdoor life. A thin internal frame coupled with a reinforced, removable camera compartment give the bag a reassuringly solid feel but all this extra strength comes at a price, namely weight, with the empty bag weighing a hefty 3kg. Further adding to the rugged feel is the host of compression straps and heavy duty attachment points for securing everything from skis to tripods or just a pouch for a water bottle.
For storage there are four compartments (all of which we’ll look at in more detail later). Opening at the back is the removable camera compartment, supplied with plenty of jazzy orange padded dividers. Around the other side is a large expandable front pocket with an internal mesh pocket. The front pocket has a waterproof barrier separating it from the camera compartment and a drainage hole at the bottom in case you need to use it for wet waterproofs. On top is a pocket for ‘personal items’ featuring a zip-up mesh pocket in the lid with a key hook. The final pocket is a narrow side pocket.
The details
Usually the details would be one of the last things to discuss but so impressive is the attention to detail that I’m just going to dive in and look at some of the clever touches here.
-
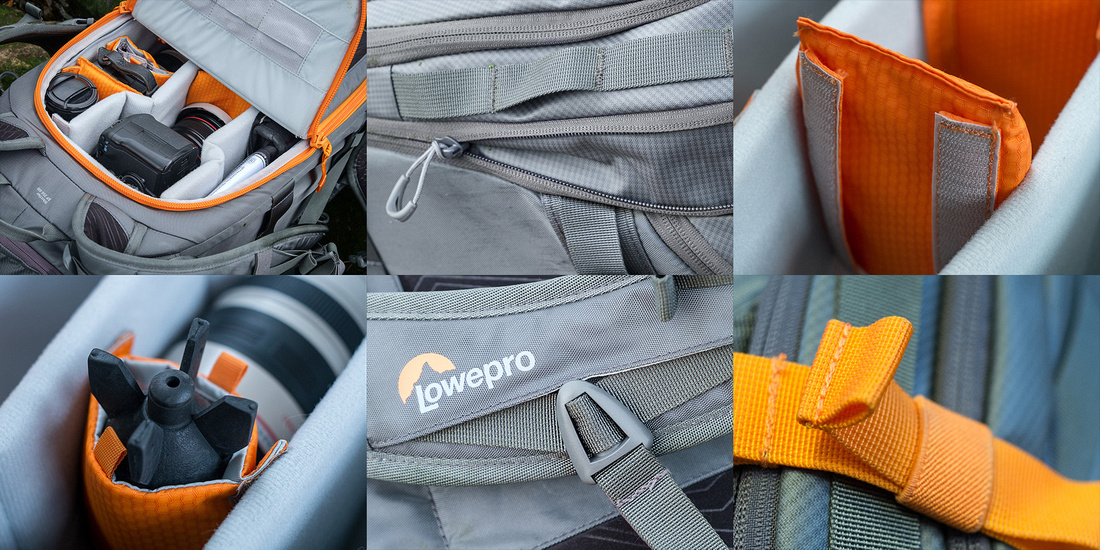
The opening for the camera compartment is hinged halfway down so that in bad weather you can access your gear without having to expose it fully to the elements.
-
The front pocket is expandable using an extra zip, a feature often seen on suitcases and a great addition here.
-
Positioning the velcro dividers in camera bags has always been made more difficult by the velcro ‘grabbing’ while you position it. The dividers with this bag have velcro flaps that fold back flat so you can slot the divider exactly where you want it then open the velcro to fix it.
-
Some of the included dividers open to reveal a pocket inside for storing smaller items, a clever little space saving feature.
-
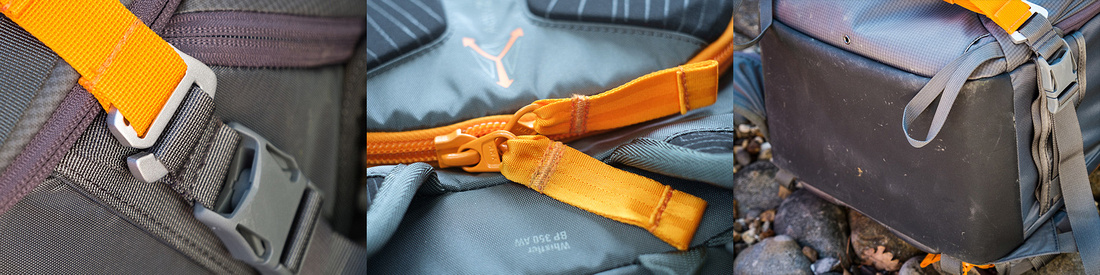
On all my previous Lowepro bags the chest strap has been secured to the shoulder straps by a less than impressive clip system, which frequently comes undone. The new system solves this problem and provides a bit of give at the same time.
-
The ends of all the straps are folded and stitched to form a flap which stops them working their way loose. I may be the only person to really appreciate this feature as I once lost half of the waist band on one of my other Lowepro bags as it slipped through the buckle.
Packing
On to the important stuff – how much can you fit in the bag? With so much storage space there are countless ways to organise the various pockets, but after half an hour spent playing around with velcro dividers, these are the solutions that I came up with.
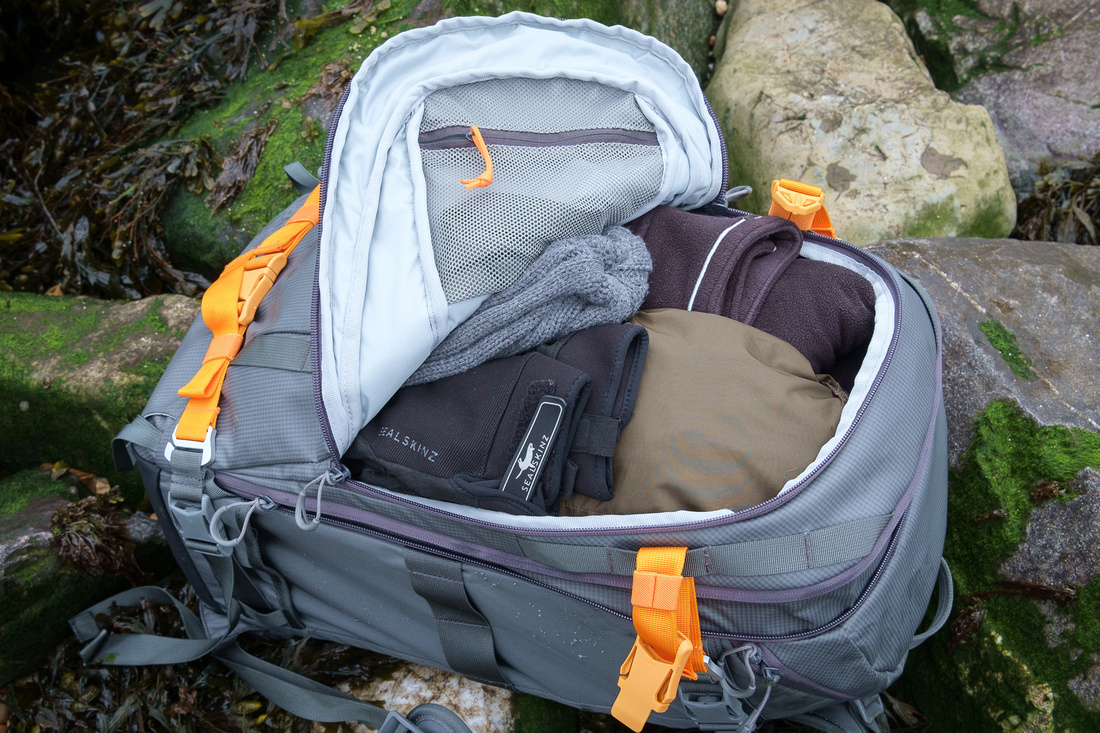
The front pocket will easily hold extra layers
Beginning at the front, the expandable waterproof pocket is a simple no-frills space which gives you the flexibility to use it as you wish. For an idea of the size, with it fully expanded it will comfortably hold a full change of clothes: trousers, fleece, waterproof smock, spare socks, woolly hat and gloves. The pocket is deep enough to fit a water bottle so could equally hold fewer items of clothing plus food and drink.
A surprising omission though, especially as it is something Lowepro often features on packs like this, is a dedicated space for a water reservoir. At the top of the front pocket is an attachment loop which would serve well for attaching a water reservoir or a waterproof bag to put one in (something I’d have liked to have seen included as it is on the ProTrekker series) but there is no opening to run the hose so the zip would have to be left open slightly.
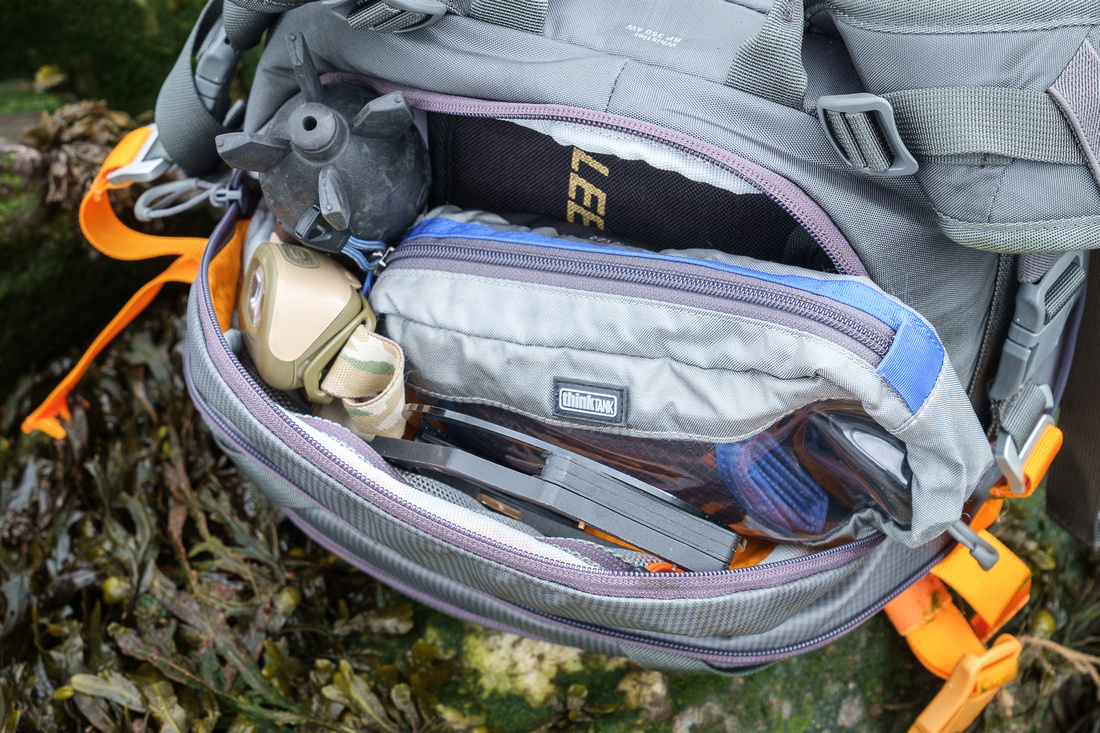
The top pocket is a decent size
Rather than being a small space for your phone and keys (which I prefer to keep in my pocket anyway), the compartment at the top of the bag is big enough to actually be useful. I have been using it to keep a Lee Filters three-pouch wallet, two filter holders, a head torch, a rocket blower and a Think Tank Cable Management 10 for holding all the bits and bobs I need. Although not very well padded, it’s deep enough to hold a compact camera – my (not especially compact) Fujifilm X-Pro1 and 18-135mm lens will fit easily, providing me with quick access while I’m walking. Alternatively, it could easily hold a small packed lunch or a fleece. In short, plenty of options.
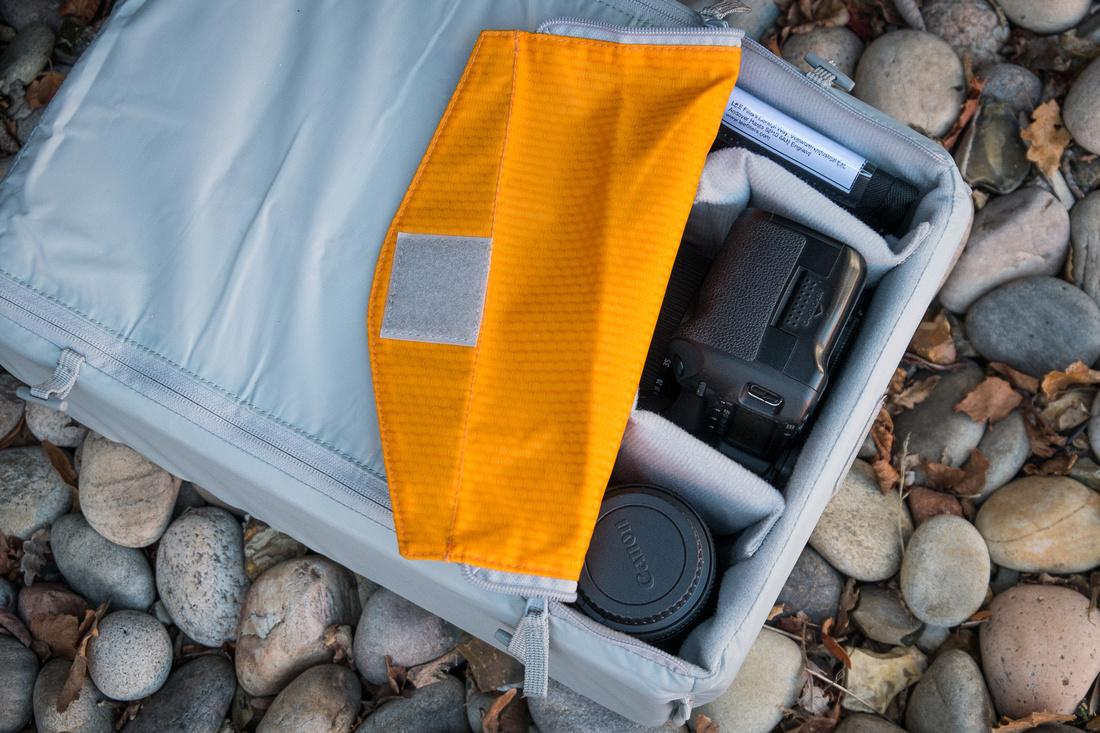
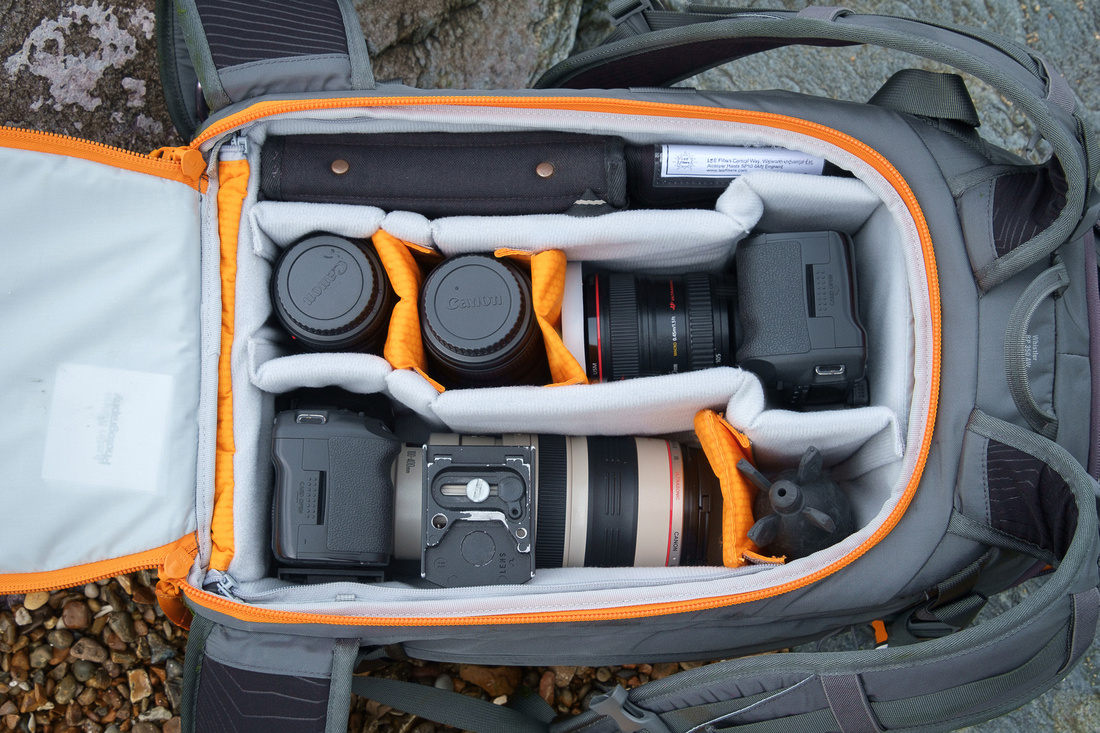
The removable camera compartment
Round the back is the camera compartment, held in place by 4 toggles, the whole compartment is removable and has a fold-back lid so it can be used for storing camera gear while the backpack is used as, well, a backpack.
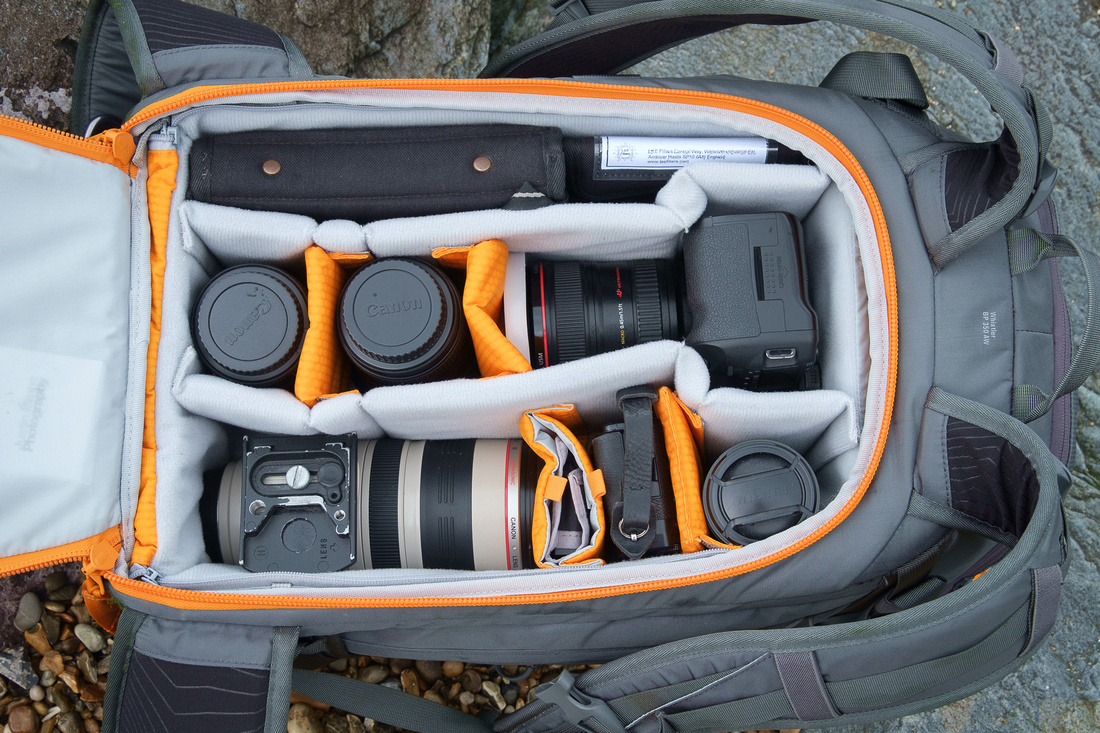
Canon EOS 5D Mark II with Canon 24-105mm f/4 L attached, Canon 16-35mm f/4 L, Canon 100mm f/2.8 L macro, Fujifilm X-Pro1, Fujifilm 14mm f/2.8, Fujifilm 35mm f/1.4, Lee filters
The compartment and dividers are well padded and large enough, according to Lowepro, to hold a pro-sized DSLR, up to three lenses, a flash and GoPro. I generally carry one DSLR, three lenses, a set of filters and sometimes also an infrared converted compact system camera and two prime lenses (see images for details). This all fits comfortably but by storing the camera body on its end it’s actually possible to fit two DSLRS, four lenses and filters. I don’t often need to carry that amount of gear but it’s nice to have the option and it gives an indication of just how much can be squeezed into the space.
Canon EOS 5D Mark II with Canon 24-105mm f/4 L attached, Canon 16-35mm f/4 L, canon 100mm f/2.8 L macro, Canon EOS 7D with Canon 100-400mm L attached, Lee filters
To round things off, on the inside of the lid there are three memory card pouches and a zipped pocket which would probably fit a camera manual or cleaning cloth.
The only small issue I have with the camera compartment is the width; my lenses all have a Lee filter adaptor attached which makes them slightly wider than normal and very snug in the bag, which is why I have had to arrange the dividers in two large columns and one narrow one, rather than the three columns you’ll see in the official photos.
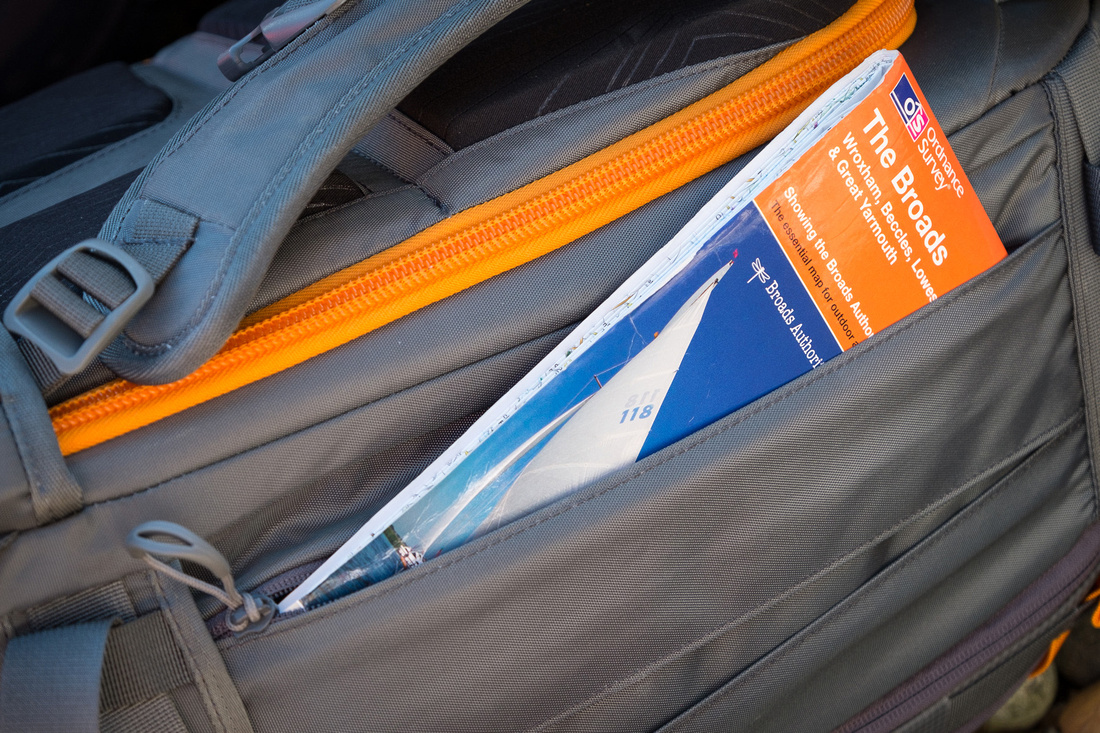
Shallow side pocket
The side pocket is one of the few things I was disappointed with as I can’t really work out what it was designed for – it’s just too shallow. The only thing I can think of is a map pocket as it (just about) fits an Ordnance Survey map. There are a couple of pockets inside, about the right size to hold a 100mm Lee filter holder in each, which is useful, but the main pocket doesn’t expand enough so putting much else in there is awkward. I use it to hold the supplied waterproof cover, a waterproof camera cover, cleaning cloths and spare lens caps… thin things in other words, and it still bulges! There’s plenty of storage space elsewhere so it’s not the end of the world but it just seems a waste when the space could easily have been used for a water reservoir pocket or something equally useful.
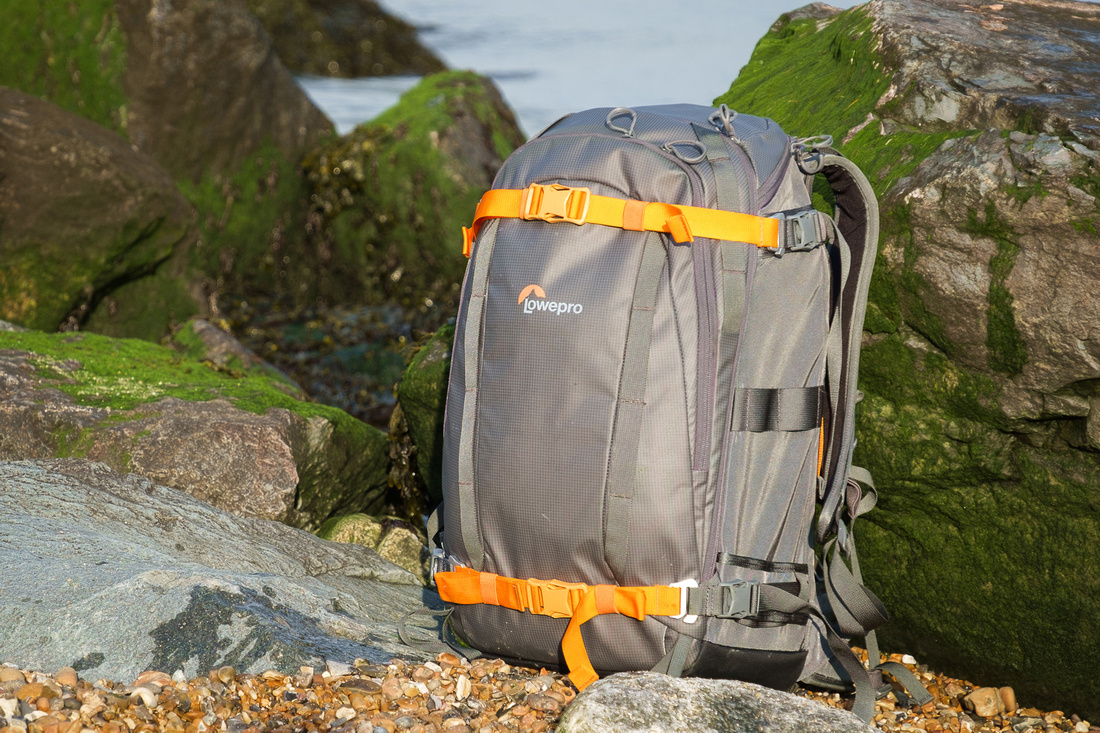
With the multitude of anchor points and compression straps (incidentally, if orange isn’t your colour those straps are removable) it’s possible to attach pretty much anything you’re likely to need to the bag without hampering access to the camera compartment. So far I’ve only needed to use the compression straps on the side to hold my tripod and the slip lock anchor points on the waist belt to attach my filter wallet (so I have both hands free to get the filters in and out) both of which worked well enough.
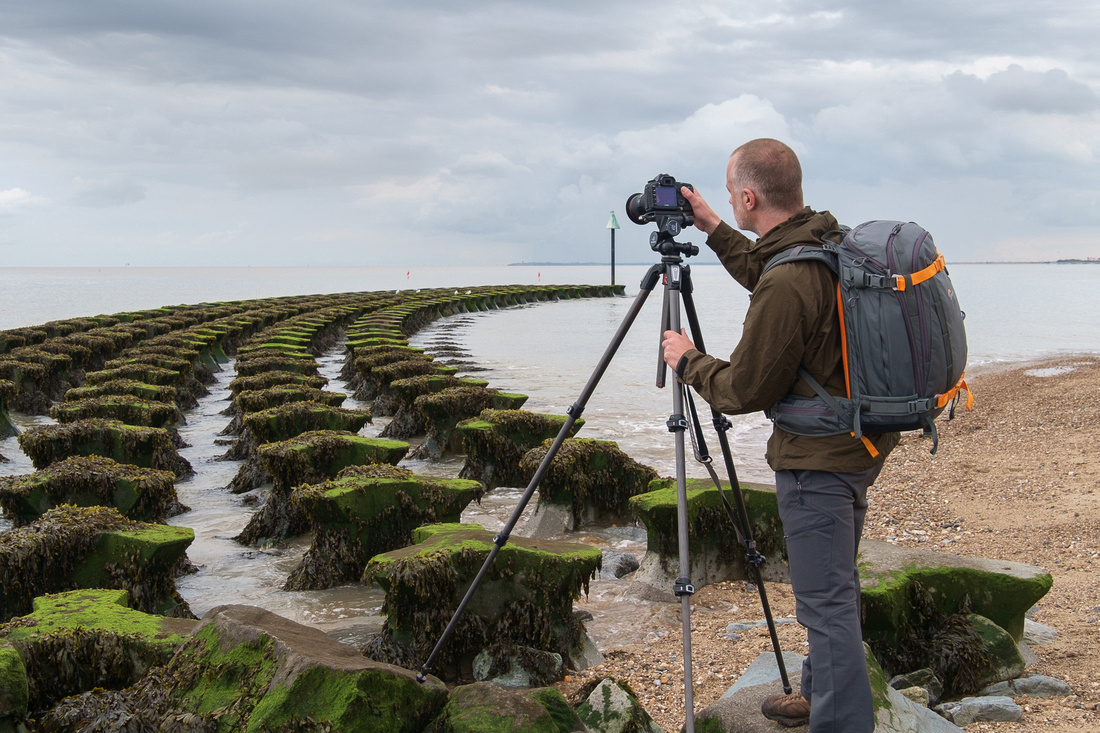
In action
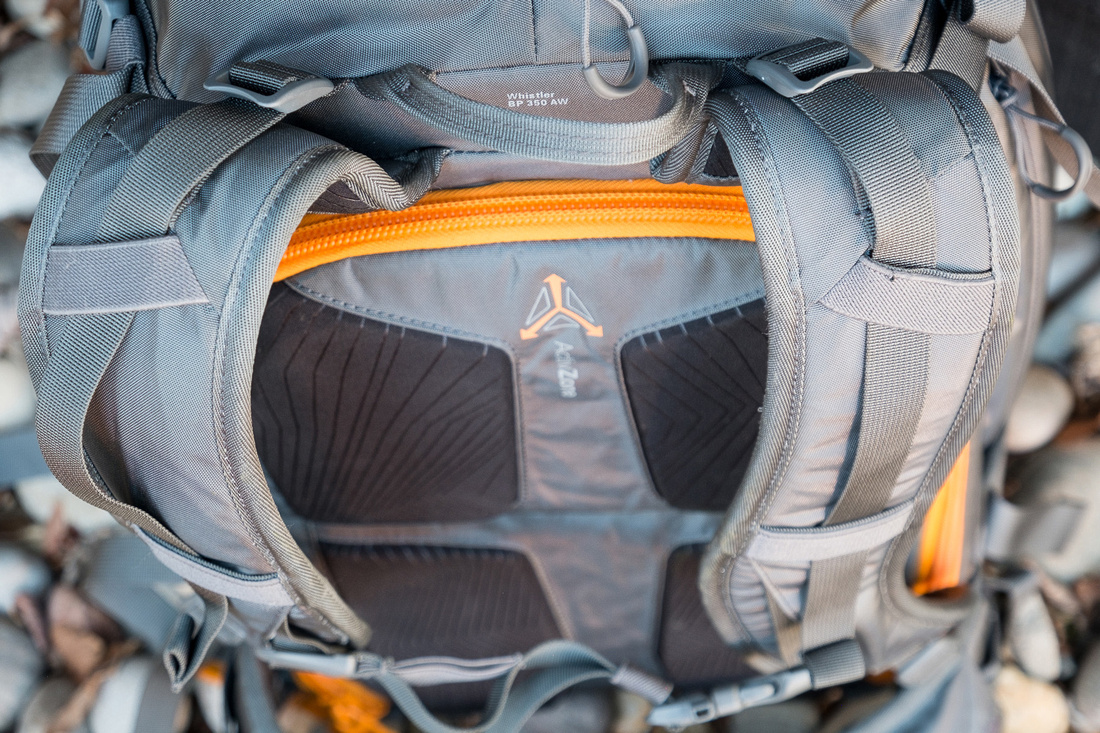
Despite the relatively heaviness of this bag (and, when fully loaded with cameras, clothes and whatever else I could fit in, it isn’t light) it is surprisingly comfortable to carry. The harness has multiple adjustments to get the pack sitting comfortably on your back. Shoulder straps are wide and although the padding is thin it is effective, while extra wide padded waist straps (with a handy zipped pocket) do a good job of transferring weight to the hips. The back panel is well padded with spaces between the four pads to allow air circulation. If you can find a suitable place for a water reservoir, the straps have elasticated loops for holding the hose in place.
Although not advertised as such by Lowepro, with the waist strap on (but loosened slightly) it’s possible to slip off the shoulder straps and swing the bag around in front of you to access your gear without having to put it down. As I’m often working in muddy or wet places, the sort of places where you might not want or be able to put the bag down, this has proved very useful.
A waterproof cover is provided with the backpack, not tucked away in a pocket as is the norm with Lowepro but in a separate pouch. I’m sure it would be wise to use it during prolonged rain when water could find its way in but the material the bag is made of is waterproof itself and in use has stood up well to heavy showers proving capable of keeping the rain out without the cover.
Verdict
I have to admit that although I liked the look of this bag I suspected that it might be too cumbersome. However it turned out to be quite the opposite – comfortable to carry and easy to access. In fact I failed to find anything other than a couple of minor things that I would change about the Whistler, it couldn’t have been much better had Lowepro been working from my own personal brief.
The Whistler 350AW and the larger 450AW are up against some stiff competition from F-stop, with their versatile range of backpacks and interchangeable internal camera units, but if you are an outdoor photographer looking for a rugged backpack with the option to carry more than just camera gear, the Lowepro Whistler BP 350 AW should be high on your list.
This review was originally published in November 2015 on the Wex Photographic Blog
Buy the Lowepro Whistler